Your menu is the reason customers come to your page, and it is the part you will change most often. The Menu section of your dashboard edits it directly: what you save is what customers see, usually within a minute or two. This page explains each control, what it does to your page, and the limits that apply.
Your menu is a list of items, each with a name, a price, a short description and a photo. Your page reads that list live and renders one card per item, in the order the items are stored, with a plus and minus stepper on each card so customers can build an order. The same list is what an order is checked against when a customer sends it, so a price on your page and the price a customer is charged or quoted can never disagree.
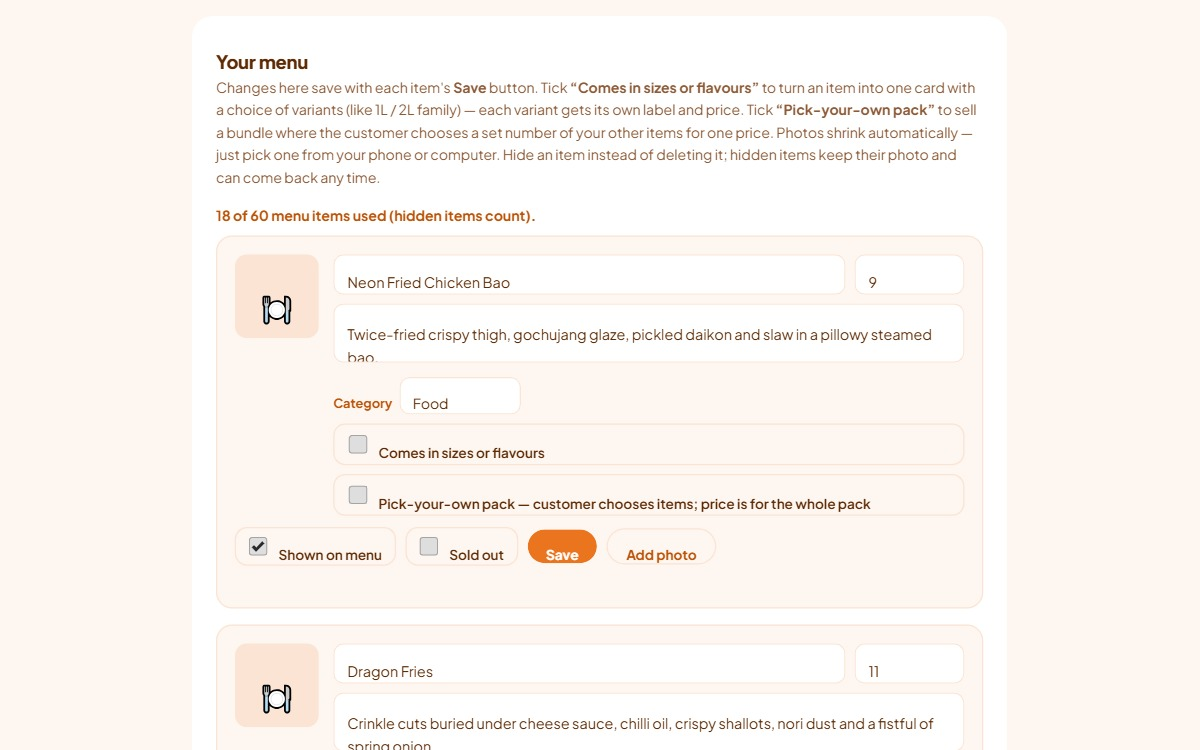
Each item saves on its own Save button. There is no page-wide save for the menu, so you can change one price during service without touching anything else.
Included onAll plans
New items are added to the end of your menu. If you want a different order, email info@secret-kitchens.com and we will reorder it for you.
To change an existing item, edit its fields and press that item’s Save. The message beside the button confirms “Saved” or tells you what was wrong.
Press Add photo or Change photo on an item and pick a picture from your phone or computer. The photo is shrunk in your browser before it is sent, so any size works and uploads are quick even on mobile data. It replaces the previous photo for that item.
A meal with sizes or flavours shares one photo across all of its variants. A hidden item keeps its photo, which is the main reason to hide rather than remove an item you may bring back.
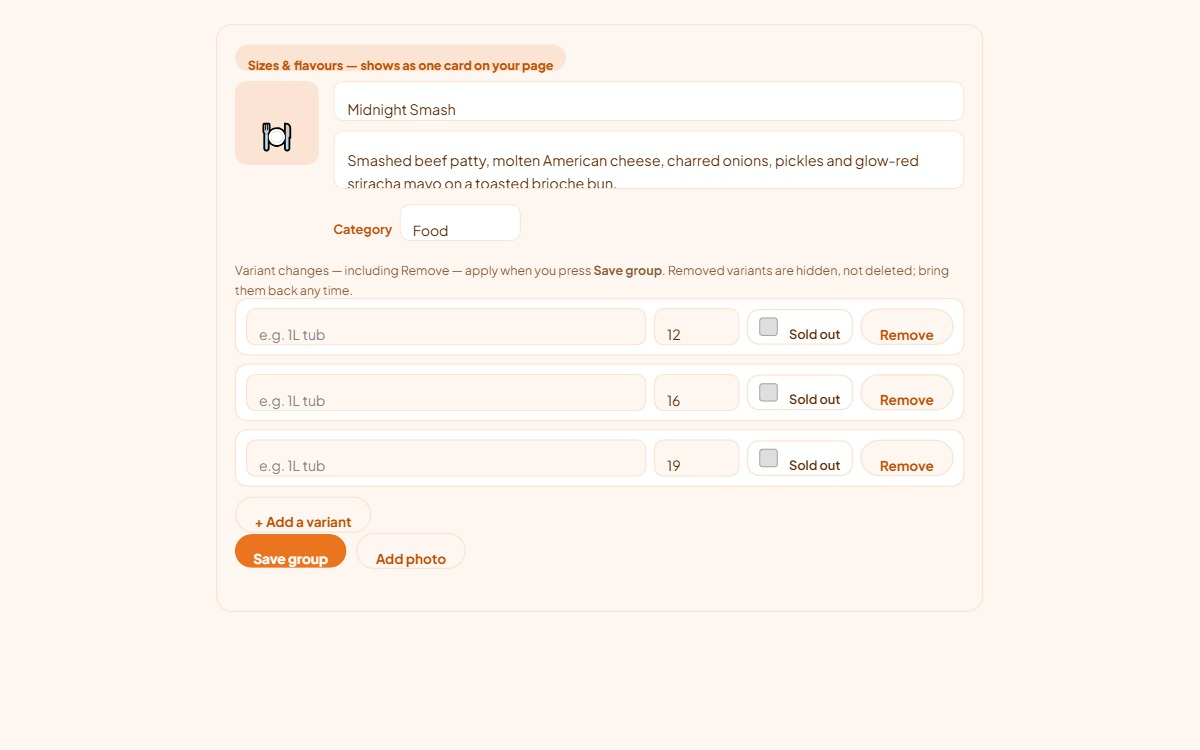
Tick Comes in sizes or flavours to sell one dish in several forms, a 1 litre and a 2 litre tub, or mild, medium and hot. On your page the dish shows as one card with a stepper per variant. In your dashboard it shows as one group with a dish name, an optional intro line, and a row per variant with its own label and price.
Afterwards the group is edited as a whole with Save group. Remove on a variant hides it rather than deleting it, and Bring back restores it. Each variant is its own menu item for the purposes of your item limit, and each variant has its own sold-out setting.
Included onAll plans
Categories group your menu into Food, Beverages and Specials. On your page they become filter pills above the menu, so a customer can narrow a long menu to drinks or to this week’s specials. Leave an item’s category as None and it sits in the main list and shows under “All”.
Set the category on each item or group and press its Save. If your plan does not include categories, the field is not shown and any categories set earlier are kept but not rendered.
Included onPremiumTruck & Stall
A pack is a bundle sold at one flat price where the customer chooses what goes in it: a “Pick 6” mezze box, a “Family dinner for 4”, a “Build your own dozen”. On your page a pack is its own card with a picker built in. The customer taps Choose your 6, picks from the items you allow, and the pack joins their order. The price you set is for the whole pack and never changes with the picks.
Tick Pick-your-own pack on an item and the slot builder appears. Most packs need one slot: Customer picks 6 from any item on the menu. You can narrow the pool to only these items and tick up to 15 of your other items. You can also add more slots for a pack with parts, such as “pick 2 mains” then “pick 1 dessert”, up to five slots, with the picks across all slots adding up to between 2 and 30.
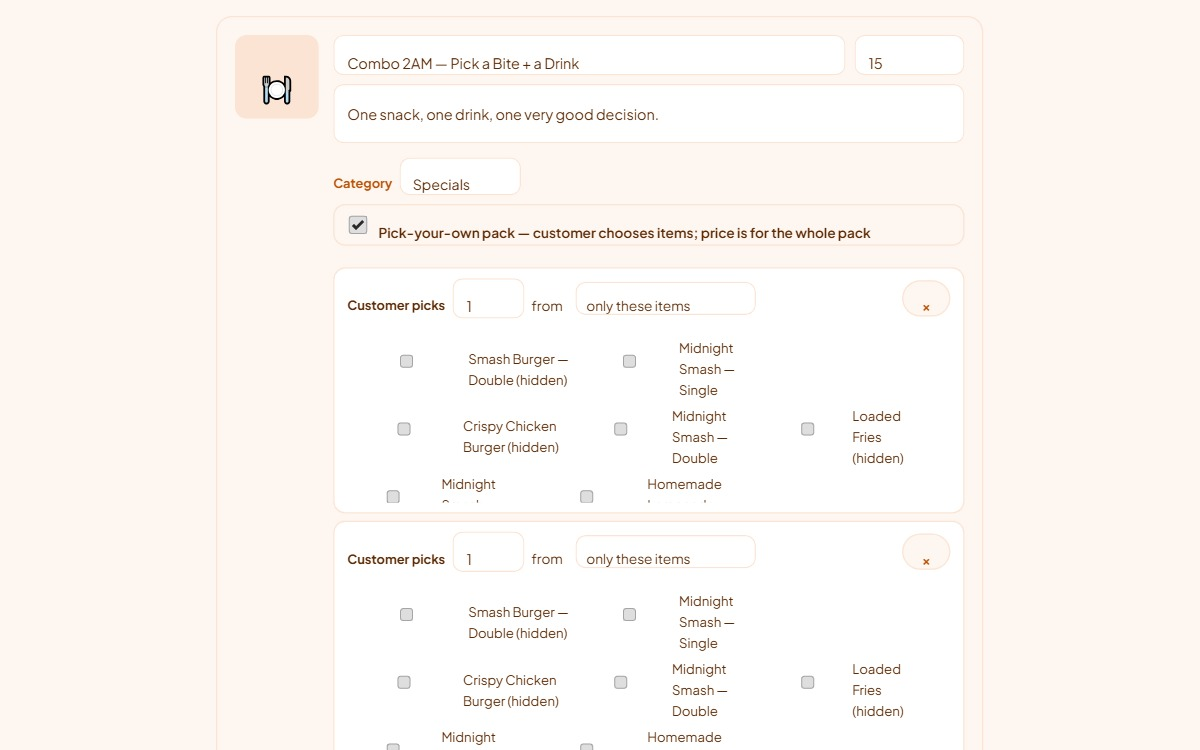
A pack cannot also be a sizes-or-flavours item, and other packs can never be picked inside a pack. If every item a slot can pick from is sold out, the pack is treated as sold out too, so customers cannot buy a box that cannot be filled. Untick the box to turn a pack back into a normal item.
Included onProfessionalPremiumTruck & Stall
When card checkout is live on your kitchen, each item and each variant gains a Stock left field. Blank means unlimited. A number is how many are left to sell: every paid order reduces it, and at zero the item closes itself as sold out. Set it before a market day and you cannot oversell a batch.
Two paid orders can occasionally arrive at the same moment for the last of something. Both customers have paid, so both orders are recorded, and the order email is marked with a stock warning so you can contact the customer and refund from your Stripe dashboard if you cannot fill it.
Appears with live card checkout onProfessionalPremiumTruck & Stall
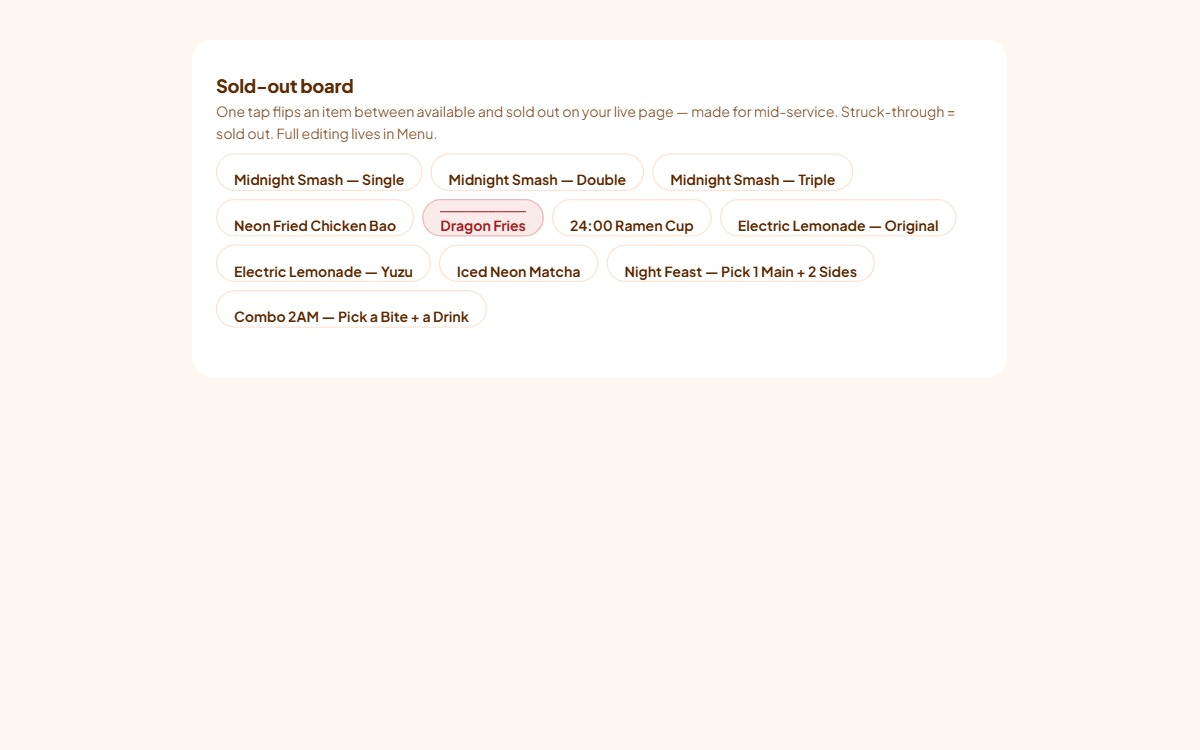
The sold-out board sits at the top of the Dashboard section and is made for mid-service on a phone. Every item that is shown on your menu is a chip. One tap flips it between available and sold out on your live page. Struck through means sold out. Nothing else about the item changes, and the Menu section’s sold-out ticks update to match.
Included onTruck & Stall
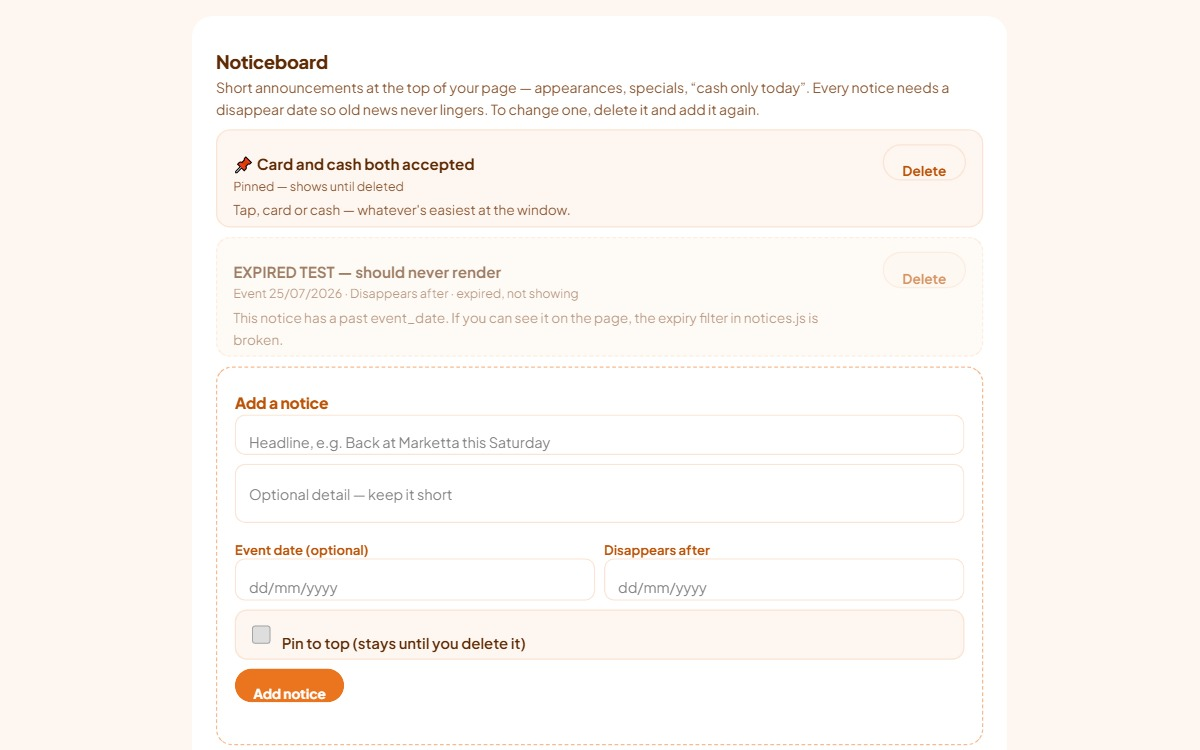
Notices are short announcements at the top of your page: this Saturday’s location, a special, “cash only today”, a holiday closure. They are separate from your menu and your hours, so you can say something time-limited without editing either.
Notices cannot be edited. To change one, delete it and add it again, which is quicker mid-service than an edit form. Delete asks you to confirm with a second tap. Your page shows pinned notices first, then the rest newest first, up to five at a time. You can store up to twenty, including expired ones, which stay in your dashboard marked as expired until you delete them.
Included onAll plans
Your page reads your menu, profile and notices live, but it is allowed to keep a copy for up to a minute so it loads fast for customers. A saved change usually shows within a minute or two. If you reload your page and still see the old value, wait a minute and reload again before assuming the save failed. The dashboard’s message beside the Save button is the reliable signal that the save worked.
Sold-out flags and stock counts on the checkout path are read fresh on every order, so a customer can never pay for something you marked sold out a moment earlier, even if their page still shows it.
| Thing | Limit |
|---|---|
| Menu items (shown and hidden, each variant counts) | 20 Essential · 40 Professional · 60 Premium · 60 Truck & Stall |
| Meal name | 80 characters |
| Description | 500 characters |
| Price | Up to $1,000 per item |
| Variants in a sizes-or-flavours group | 2 to 6 |
| Slots in a pack | 1 to 5, with 2 to 30 picks in total |
| Items in a slot’s “only these items” list | 15 |
| Notice headline / detail | 80 / 500 characters |
| Notices stored / shown on the page | 20 / 5 |
Was this page useful? Tell us what was missing and we’ll improve it.
 Secret Kitchens